Air conditioning in a 240sx with an LS1 swap. The complete post.
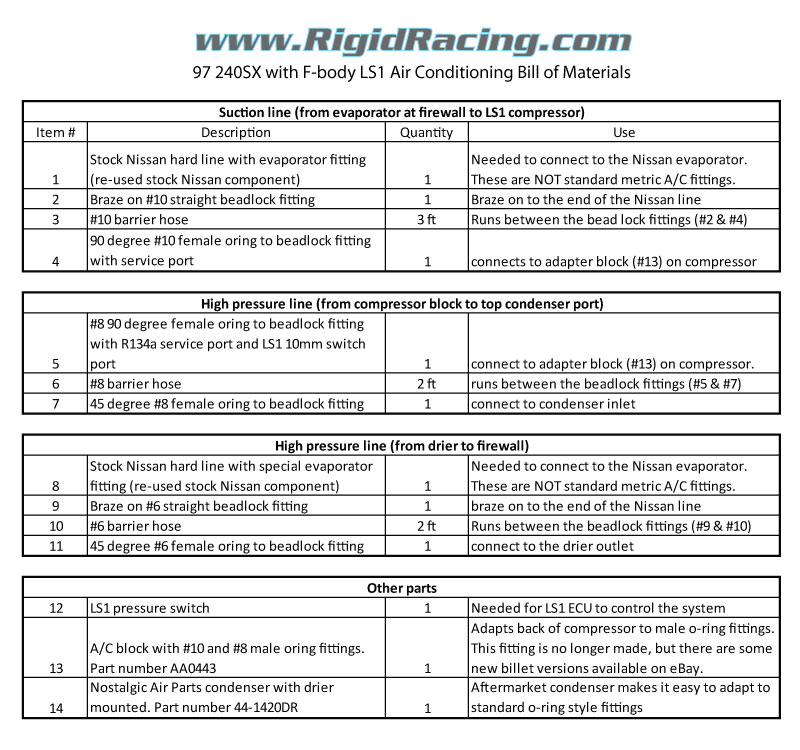
The most frequent questions I get are about my air conditioning setup. I’ve had it working for almost a year and have finally put everything together in one big post. Most everything else about these swaps is now taken care of with swap kits. The air conditioning is a bit harder due to the fittings Nissan used at the evaporator. It seems that Nissan not only used different fittings for different years, but they are not standard metric A/C fittings. I bought several different metric air conditioning fittings and while they would screw on, they had no chance of sealing. The air conditioning system takes a little bit of work, but is easy to get working once you understand what is involved. I’ve completed a bill of materials for the parts I used to get my system working.
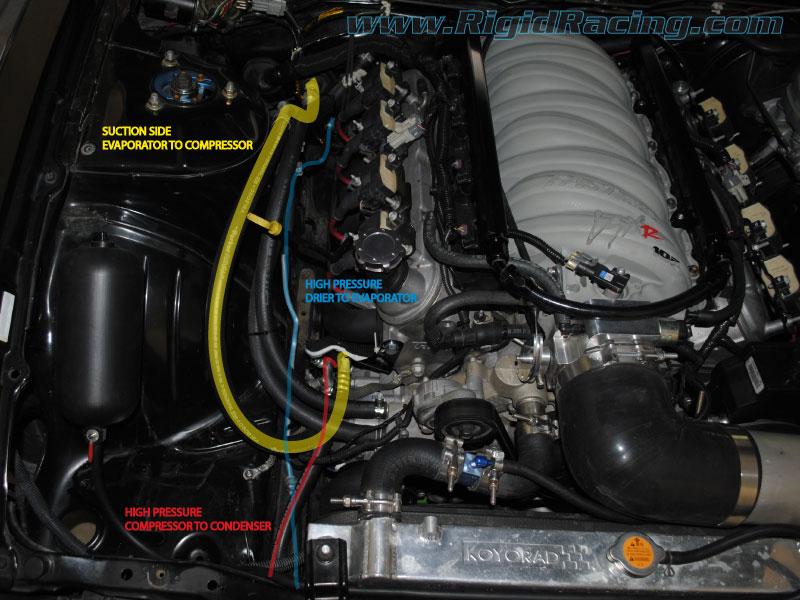
This is the routing of the hoses:
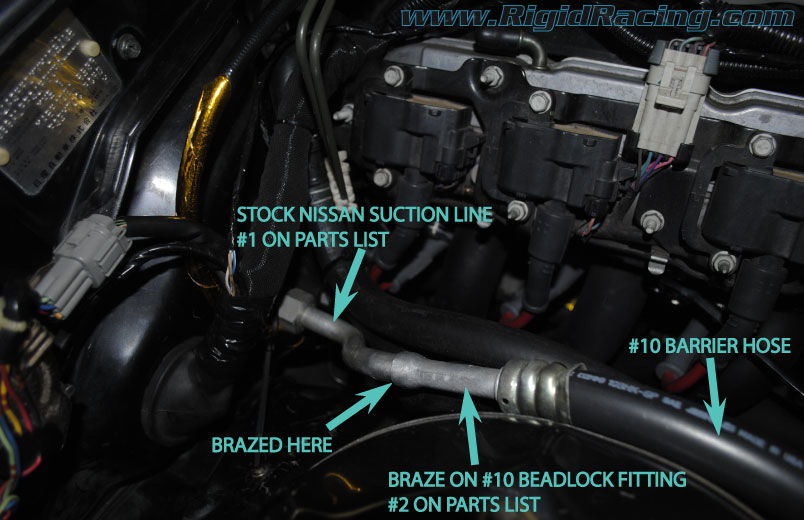
The only hard part for most DIY people is going to be the brazing and the beadlock crimping. I found a local place to do the crimping and I bought a low temp aluminum brazing kit to do the brazing. I would not suggest learning to braze with these. If I could do it again I would have had them brazed elsewhere. The brazing rod, flux, and torch were about $100, the guy at the A/C place said he would have charged me $10 to braze them. In the picture below you can see the original Nissan line that has been brazed on to a bead lock fitting.
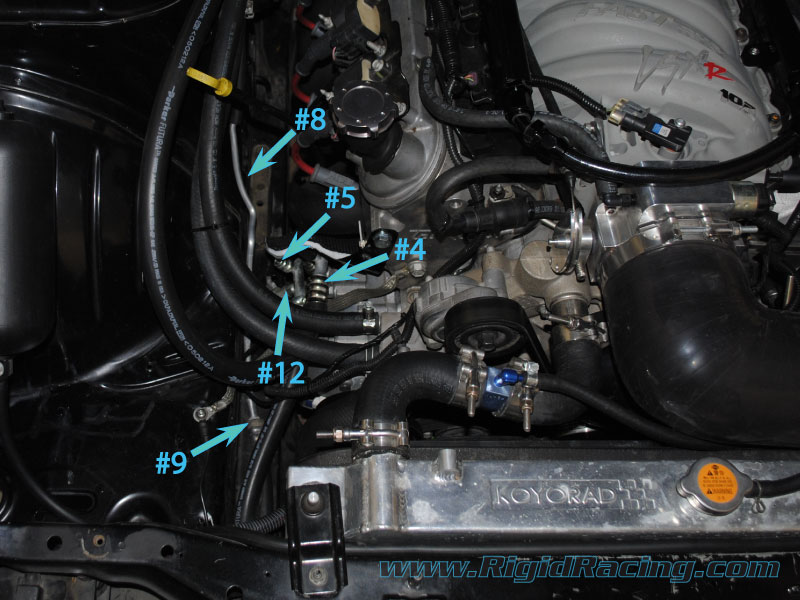
Here is an overview of the fittings involved around the compressor area (the number call outs are on the BOM above):
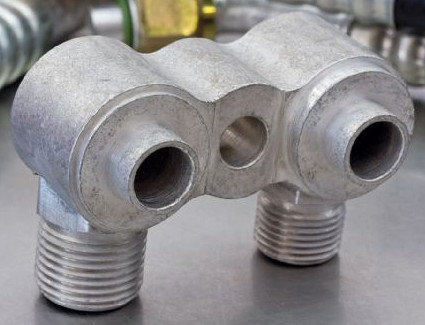
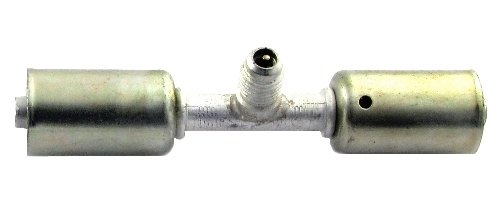
The hard part to find now is the rear compressor block adapter. This is really the key part to make this system happen. It will convert the rear of the compressor to a #10 and #8 male insert o-ring fitting. The cast version is no longer available on the market. I must have got one of the last ones. There are some nice billet versions on the market now, I have seen them on eBay. Here is what it looks like:
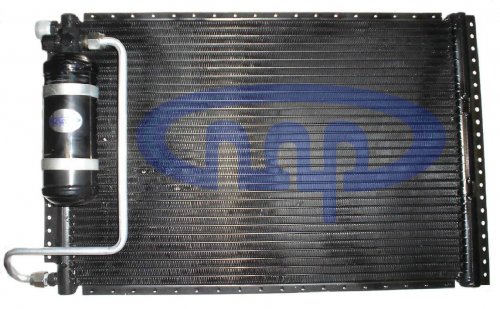
The condenser I am using is from Nostalgic Air Parts and it has the drier already plumbed in and attached, which is awesome. I got the 20 x 14 unit, part number 44-1420DR. They have a unit that is slightly longer, but I was afraid it wouldn’t quite fit. I think with a little work the larger one could work.
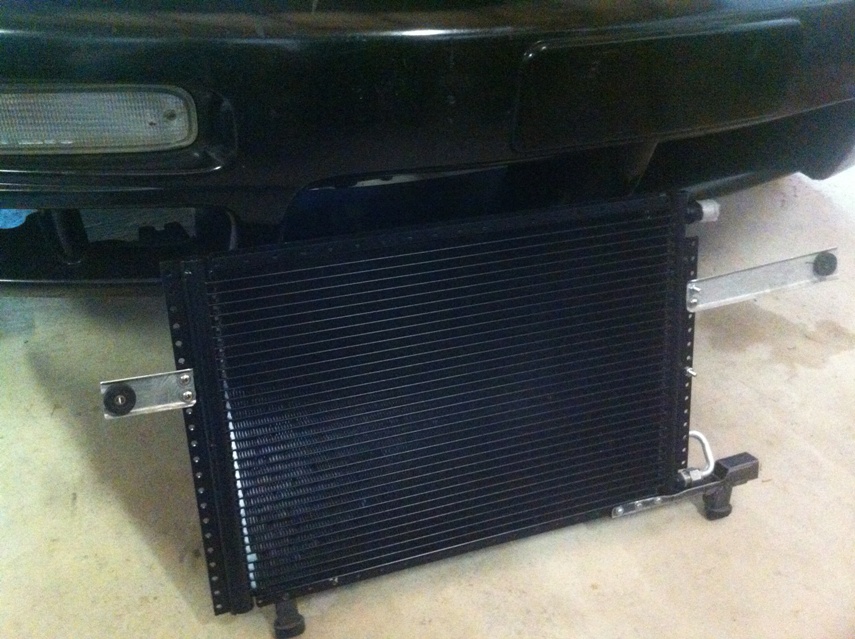
I have used the stock Nissan rubber isolators to mount it. I made some brackets for the top. One of the bottom ones bolted right up and the other needed a little extension to work.
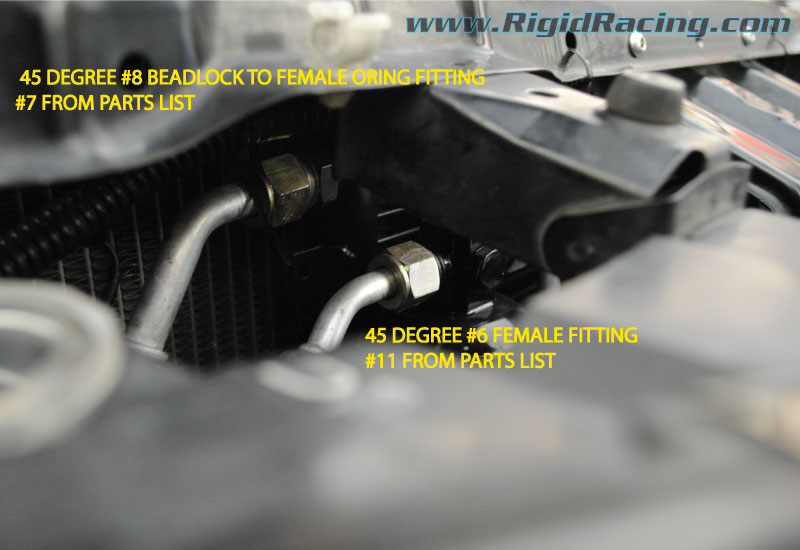
Connected to the condenser and drier I have 45 degree fittings. The condenser has a #8 male insert o-ring fitting. The drier has a #6 insert o-ring fitting. This worked out great, because the stock Nissan high pressure line going into the evaporator is #6, and the compressor adapter block is a #8.
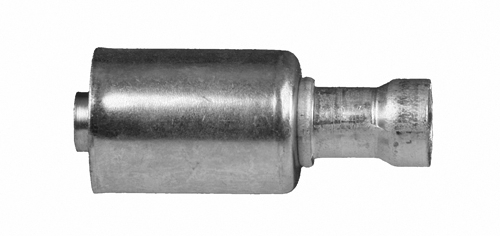
The two Nissan hoses that need to be adapted will have to have bead lock adapters brazed on. They have fittings just for this with a flared end to slide over the stock line. A #10 was used on the suction side, a #6 on the high side. They look like this:
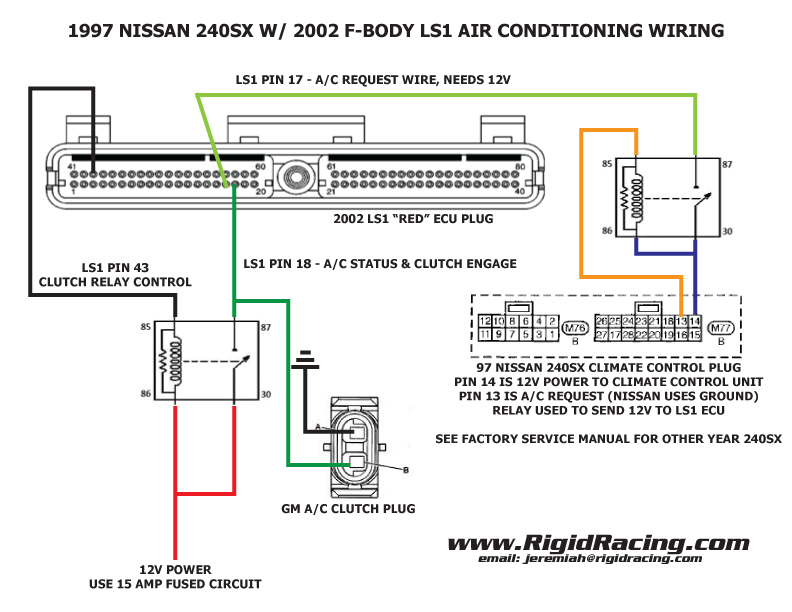
Once you have the hoses made you can move on to the wiring. You’re going to need a volt-ohm meter, I used a cheap $5 one from the import tool store. I’ve covered the wiring once before in another post, but I’ll cover it a bit more here. The stock LS1 f-body computer needs to see a 12v request signal on pin 17 to get the A/C going. The stock 97 240sx climate control unit uses ground to tell the compressor to kick on. So a relay will be needed to send 12v to the LS1 ECU. I tapped into pin 14 on the 240sx climate control unit to get 12v. I used the ground signal coming from pin 13 to close the coil and send 12v to the LS1 ECU. Pin 43 of the LS1 ecu is the clutch relay control, it uses ground. You’ll need another relay here, It needs to send 12v to the compressor and pin 18 on the ECU. Pin 18 is the “A/C status” wire. I’m not 100% why they put that in, but it was on the F-body diagram. If you are using a factory f-body harness it should have the wiring already there for this, you’ll just need to hook up the 12v signal and relay. I didn’t cover the pressure switch wiring because that should already be in the harness, you’ll probably just have to lengthen it. I rambled on a bit there so here is the diagram which may explain it a bit easier:
I would bet the 240sx climate control wiring will be different for the 95 and 96 models. But once you figure out what wire engages the A/C on the 240sx (or any other car really) you can pretty much wire it up the same way.
So after a couple of months of research, hard work, ordering wrong parts, fabricating, learning to braze, and wiring it all paid off:
I do have some recommendations for those of you who want to try this:
1. Don’t get service ports on the 90 degree fittings coming off the compressor. It’s compact and neat but the headers will melt the caps right off! You can see in the pictures that I have a pretty serious heat shield between the fittings and the header. Its an aluminum heat shield with DEI tunnel shield fiberglass/aluminum heat blocker on it. It wouldn’t look as good but if I had to do it again I would have bought splicer type fittings like these and put them in the hoses:
2. The factory LS1 A/C pressure sensor port is very hard to come by on aftermarket fittings. It is a male 10mm switch port. The fitting I found came off a class 8 truck. You don’t want to use that fitting. It put the fitting very close to the frame rail. Your best bet is to get a factory GM line, cut the port out, and have it brazed in somewhere on your high pressure side. I’m still looking for a better solution for this.
Feel free to share this and email me with any questions!
Thanks for writing this A/C stuff down, I am doing a fox body LS-1 swap and about to tackle the A/C. Lots of good info, thanks.
[…] The air conditioning is going to be the hardest part to get working. Everything else will bolt in. There aren't any kits that I know of so you are probably on your own. I do have A/C in mine and tried to document everything as best I could: https://www.rigidracing.com/2013/09/0…complete-post/ […]
Hey,
Where do you get the part #5?
I spent a lot of time looking for the #6 splice with the pressure port. Found it here if anyone else is looking.
http://www.ebay.com/itm/321728595062?ssPageName=STRK:MESELX:IT&_trksid=p3984.m1555.l2649
Why did you decide to not use the S14 condensor and use beadlock straight slice crimps to merge LS1/S14 lines? granted your setup looks a lot cleaner just wondering if it was just for aesthetics
[…] see why you couldn't put a stock one back on. AC shouldn't be a problem. Lots of info out there https://www.rigidracing.com/2013/09/0…complete-post/ googletag.cmd.push(function() { googletag.display('div-gpt-ad-14'); […]